Games are fun. I mean, games are really fun. But you know what’s not fun? Games that look like jump-ass GIFs… In general, games take a lot of work to make and they take a lot of logic to run whether that’s just code or objects within the game + physics. Due to this, it’s not hard to make something amazing that runs incredibly slow so today, let’s try to optimize something!
Today we are focusing on what we call ‘Spatial Partitioning’ which is commonly used to speed up rendering in games by figuring out what sections of a map are empty and just ignoring those rendering sections. Different types can include grids, quad-trees, oct-trees and more although, for me, I’m choosing the grids option.
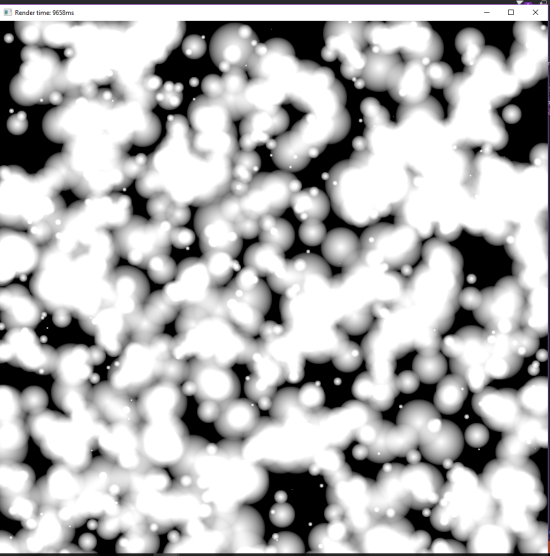
The above image is the result of a framework given to me by one of my university tutors named Greg, he also did all of the work on the Kojak framework(kf:: namespace) I’ll be working with(Mostly to use Vector2’s). What this framework does is it creates a Circle class containing an empty Vector2Postion and a radius in the form of a float, and then an empty list of the Circle class is created. The script then populates that list with 1000 circles and then draws them with a gradient effect coming from the center point. The result is a neat looking image that takes a whole 9658ms to render (~9.6 seconds). Now, my job is to see if I can improve that speed, well, let’s see.
The Optimising

First I adjusted the Circle class to have two more Vector2s so that I could store minimum and maximum x&y values which we will talk about later on. I then created a Grid class which stores it’s own Vector2 min and max values as well as an empty vector list of circles. Below this class, I created a map of grids and an empty vector list of grids which would hold any grids with circles in them. I also had an extra vector list of Circles in the image on line 34 although that’s just something I forgot to delete so ignore that.
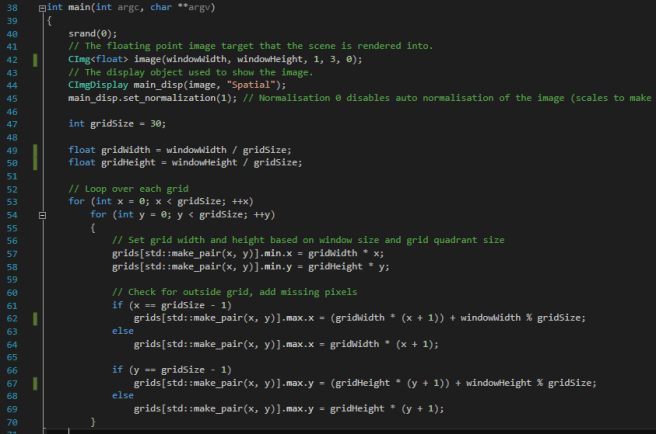 Next, came the main function, Just like the original I created a window to start off with. I then declared how many grids I wanted and then set their widths and heights based on that and the screen size. the gridSize = 30 means a 30×30 grid and I found that size to be the sweet spot between load time and rendering time. Less grids means faster loading/gridcreating and more grids mean faster rendering but with diminishing returns. I then looped through all the grids setting the positions while checking to make sure there are no missing pixels.
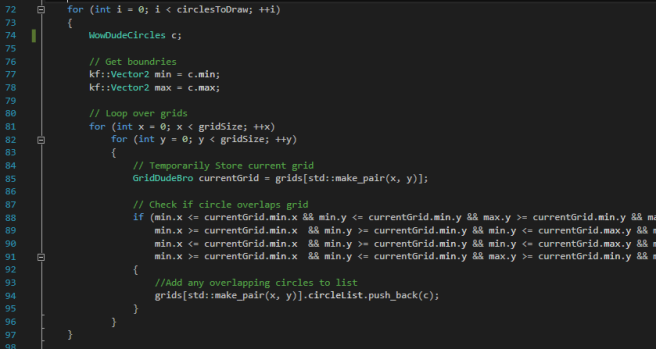 I then created all of my circles in a big for loop and added them into the correct grids based on their positions. Using a technique shared to me by Jori Wright, I checked every circle before doing so to see if they overlapped into any other grid section, this big nasty ‘if statement’ made a difference of about 2-4 seconds of rendering as without it overlapping circles are drawn multiple times. After adding every occupied grid into my ‘NotSoEmptyGrids’ list so that I only every call an occupied grid in the future, I got into the actual rendering section!
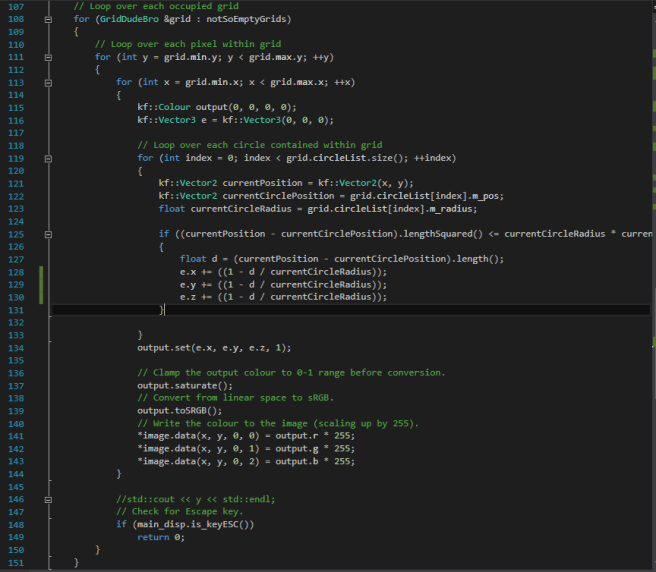 This section loops over every occupied grid’s pixels and all of its circles. The script then checks the pixel’s position and colours it based on how close to a circle it is. Not much changed in this calculating from the original so I won’t go into too much detail about the changes. While there are a few lines of code not in the pictures, they don’t relate to my optimisation so let’s just have a look at the results.
Outcome
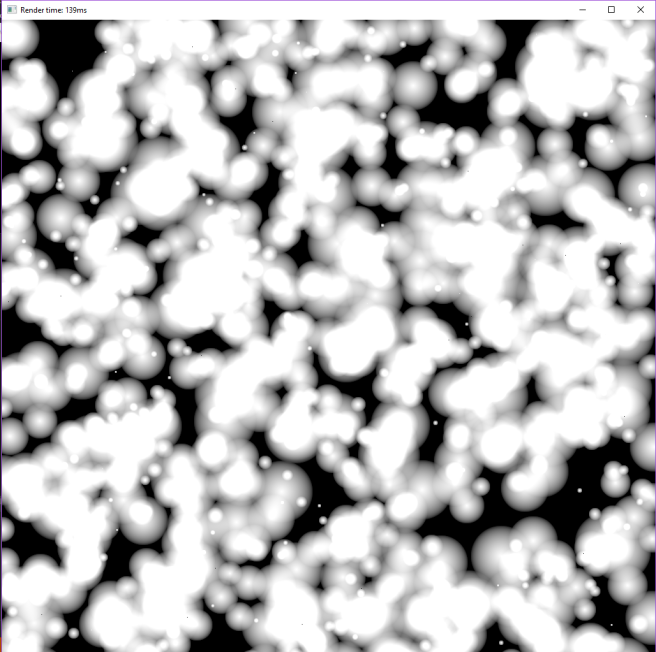
As you can see from the top of the picture, the rendering time is a lot shorter than it used to be and there is almost no difference in loading time. I now render the same amount of circles in 1/90th of the time give or take a few ms.
Although I also went a few steps further and added random colours both as a noise effect and a cool looking coloured circle effect. Have a look! While the noise version slowed the rendering down a bit, the coloured circles kept the same rendering speed!
Noise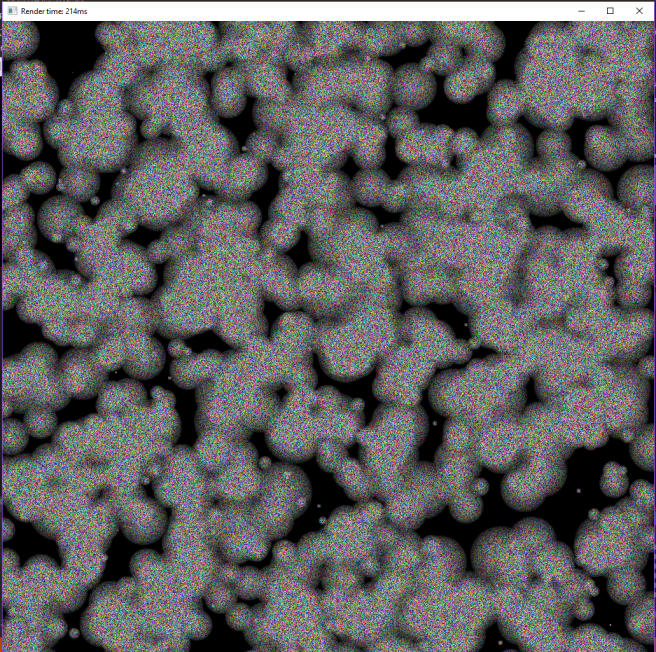
Colour!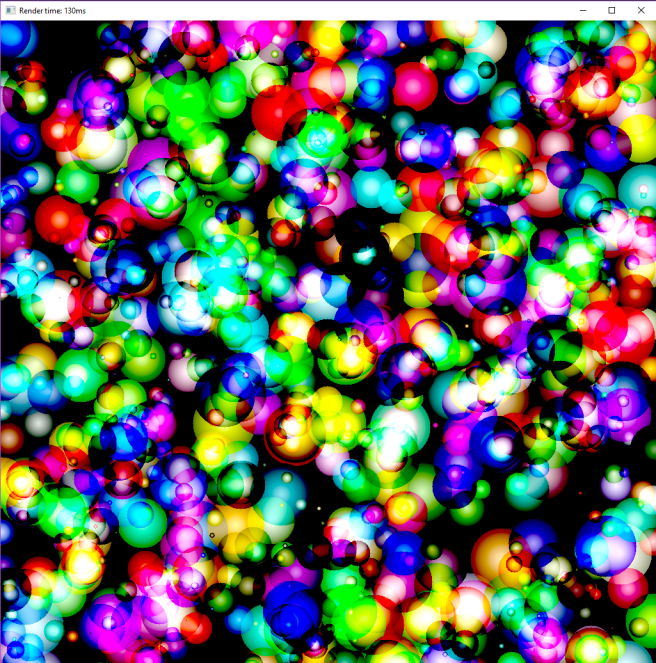
Thanks for checking out on my journey, I’m looking forward to covering how to combine meshes in Unity for mobile performance so keep an eye out for that!

One thought on “Optimise Everything! – Spatial Partitioning”